November really sunk my creative spirit. My grandfather, a truly great man, passed away at the age of 91... on Rememberance day no less. Then illness descended on our family just days after the funeral. Flu, bronchitis, colds, sinusitis, pink eye, you name it- one of us had it. I spent a solid three weeks unable to get out of bed.
No wonder I had a burning urge to get back to the studio after Christmas! The Monster Pit was overhauled for another year of projects. New shelving, lighting, extra electrical outlets (thanks, Honey Bun!!), and a full restock of materials really put the wind back in my haunting sails.
Because of all that lost time, I have been on the electronic computing machine much less these days (or rather, the ECM for us technology-ies), and productivity is ramping up. So, January, despite your arse-freezing -33C windchills of late, and the general malaise you usually bring, you have not won this year, oh no!!
Here's the first in a series I'm working on for the shop- yard haunt monster arms on stakes. His working name is Gruesome Grossman, and his belle, Ghoulia, is currently in progress. That reminds me, does anyone remember the Flintstones episode with the Gruesomes? Loved them! :D
Well, it's back to work! TTYL! :D
Wednesday, January 26, 2011
Monday, January 17, 2011
To Weld or Not To Weld
I was working for the boss in the Monster Pit (engineering dept.) and I had to repair a prop that was proudly labelled "Made in China". That should say it all right there. But it is so sad to see products made so cheaply, by unskilled labour, for pennies, and at gunpoint...possibly...maybe.
The point is that a metal prop was held together by a dot...a miniscule dot of solder. Not even a spot weld. Poo poo caa caa. As a millwright I hear a certain saying a lot in the field. As a courtesy, I will be clean. But it goes like this - "You put crap in, you get crap out." You get the picture.
Getting back to the issue here, sometimes there are instances where a project or prop needs a sturdy frame. Or perhaps there may be a consideration of strength where twisting wire just will not do.
So consider welding that frame. Sure it can be intimidating. So was riding a bike, or trying that mystery meat casserole. But you lived! You don't have to be a millwright to be a home hobby welder.
Most home haunter's could easily get used to a small mig welder, which incidently is a wire spool feed. It doesn't take much to operate one and they are pretty forgiving. Unlike a stick or arc welder that really gets hot and can literally melt away steel and blow holes in your work.
The downside to migs up here in Canada is the cold. As I write this it is warming up to -4 degrees celsius or 24 fahrenheit, up from -19c (-2F). That unfortuantely makes the spool wire brittle inviting many wonderful opportunities to learn and use expletives in new languages.
But aside from the cold a welder can assist you in projects in a great many ways. Think of how much wood it has taken to build that frame. "This #%*!! thing is so heavy." What if you had made that frame out of tubular steel or aluminum? Totally tubular. Sorry had too.
It's stronger and lighter in some aspects.
Right now I have an AC only arc welder. Sure I wanted the AC/DC model but this one was on sale at Canadian Tire for 75% off.
I was like a cougar on a wounded chicken.
It has done wonders for me especially with a project that will be exhumed at a later date.
I have the flexibility to work with different thicknesses of steel, from thin sheets to heavier angle iron. I can also get a wide variety of welding rods to suit my task as required.
The point is that a metal prop was held together by a dot...a miniscule dot of solder. Not even a spot weld. Poo poo caa caa. As a millwright I hear a certain saying a lot in the field. As a courtesy, I will be clean. But it goes like this - "You put crap in, you get crap out." You get the picture.
Getting back to the issue here, sometimes there are instances where a project or prop needs a sturdy frame. Or perhaps there may be a consideration of strength where twisting wire just will not do.
So consider welding that frame. Sure it can be intimidating. So was riding a bike, or trying that mystery meat casserole. But you lived! You don't have to be a millwright to be a home hobby welder.
Most home haunter's could easily get used to a small mig welder, which incidently is a wire spool feed. It doesn't take much to operate one and they are pretty forgiving. Unlike a stick or arc welder that really gets hot and can literally melt away steel and blow holes in your work.
The downside to migs up here in Canada is the cold. As I write this it is warming up to -4 degrees celsius or 24 fahrenheit, up from -19c (-2F). That unfortuantely makes the spool wire brittle inviting many wonderful opportunities to learn and use expletives in new languages.
But aside from the cold a welder can assist you in projects in a great many ways. Think of how much wood it has taken to build that frame. "This #%*!! thing is so heavy." What if you had made that frame out of tubular steel or aluminum? Totally tubular. Sorry had too.
It's stronger and lighter in some aspects.
Right now I have an AC only arc welder. Sure I wanted the AC/DC model but this one was on sale at Canadian Tire for 75% off.
I was like a cougar on a wounded chicken.
It has done wonders for me especially with a project that will be exhumed at a later date.
I have the flexibility to work with different thicknesses of steel, from thin sheets to heavier angle iron. I can also get a wide variety of welding rods to suit my task as required.
As in the picture I have the 1/8th standard rod on the left, the 3/32 rod in the middle and the 1/16th rod on the right. All are E6013 rods (easy weldablity) and each thickness is for a different application with different levels of heat. Think about it and the possiblities. Do you know someone with a welder (not me) who would be willing to show the basics just to fart around for an afternoon? To weld some scrap steel, chip some slag and get an awesome sunburn from the UV's. Great! Try it, consider it as a way to add on to your skills as a home haunter. Plus the neighbours think it's pretty cool watching the arc flash and realizing too late that their cornea's are fried and that their eyeballs are about to melt.
Have fun, grab a stinger and strike an arc, but please, be careful, don't look at the arc flash without protection, don't weld near very flammable foam - POOF instant cyanide, and be aware of who is around you, kids are drawn to the arc. Good luck.
Thursday, January 13, 2011
Ever have non-buyer's remorse?
You know, that thing you should have jumped on, but you stalled like a lame-brain, and someone beat you to the punch and NOW IT'S GONE FOREVER? *deep breath* Yeah, this one is mine:
Just imagine this phantom fam strolling in the moonlight over the misty moors. :D
These remarkable costumes are from Reveries of Solace on Etsy. The attention to detail, quality and authenticity make these my fave Victorian ghostie pics period. She even nailed the hair and makeup. And really now, could those kids be any cuter?!
It's worth mentioning that this lovely lady also has other fabulous costumes currently available in her shop- the Absinthe Fairy and Hecate designs are especially gorgeous.
Just imagine this phantom fam strolling in the moonlight over the misty moors. :D
These remarkable costumes are from Reveries of Solace on Etsy. The attention to detail, quality and authenticity make these my fave Victorian ghostie pics period. She even nailed the hair and makeup. And really now, could those kids be any cuter?!
It's worth mentioning that this lovely lady also has other fabulous costumes currently available in her shop- the Absinthe Fairy and Hecate designs are especially gorgeous.
Friday, December 31, 2010
Spooky Tree tutorial: constructing the Garden of Evil
Happy New Year, everyone!!! :D
Here we go- my first tut as per special request. Hope it's reasonably easy to understand! If not, feel free to ask away. :)
It's quite easy to get started- this piece is based on a 12 1/2" Sono tube. Decide how long you want your tree to be, but be aware that leaving it too long will be cumbersome.
We used a hand saw to put an angled cut on the bottom to lean the tree around 10 degrees. Then about 52" up the trunk make a dark line around the circumference, with a large hatch mark 180 degrees from each other. Then make another cut through the line between 10 - 15 degrees. Don't go any steeper than that. (I'll explain later). Now that you have severed pieces, you will notice that they are oval not round. So place the short section on the top of the long, rotate and line up the two hatch marks you made before. Now the ovals should lay on each other fairly evenly. Now get in touch with your inner Red Green and reattach the sections with duct tape, and then again with layers of strip paper mache for strength.
Here's why you don't go too steep on the angle, the photo isn't the actual tube I ended up using... after cutting and lining up the hatch marks we decided that the lean ended up being too severe and the tree too short. As you can see, the jagged detailing at the top has already been added.
The stand was built using the finished angle of the tube. Base it on whatever degree you like. But we set the sono tube on 3/4" plywood and traced the inside oval twice for a top and bottom piece. Then had (4) 2x4x36" cut with an angle to match the lean of the tree. Attach one to top and one to bottom with sharpest part of ovals facing the lean. In the photo there are (4) 2x4x30" feet attached to the bottom oval to support the tree and to give a base for "evil roots".
With the arm frames finished, the next step is to transfer the desired position to the bark. With someone to help (unless you have three hands), hold the arm frame where you want it and circle the rod with a pencil. Then drill through with a clearance hole a bit larger than 5/16 such as 11/32 or 23/64.
This is an edge on end view of the wood needed, 2x6x8-1/2. It shaped by a hand planer to reasonably match the curve of the sonotube inner wall. I know what you're thinking, why bother? I'll just put a 2x6 in and it will work. Sure it will. But it will also only be in contact at two points, whereas this exquisitly shaped piece gives full support with more weight distribution. On the outside I placed a 3/4x2x6 to further support the arm. Over tightening will inevitably distort and crush your tube and bark. Plus it looks better. See comparitive image.
As you can see the block on the left that you took such time to craft sits flush in the tube and will give better support, far better than brand "X" on the right.
When the rods are placed through the holes of the support blocks, use a washer and a 5/16 nut to hold it in place. Tighten down but, do not over tighten as you will crush the bark.
In retrospect one change I would have made would be to have the arm support blocks permanently mounted to the outside and inside of the body. Then lay the bark around it instead. Consider this as an option.
Here we go- my first tut as per special request. Hope it's reasonably easy to understand! If not, feel free to ask away. :)
It's quite easy to get started- this piece is based on a 12 1/2" Sono tube. Decide how long you want your tree to be, but be aware that leaving it too long will be cumbersome.
We used a hand saw to put an angled cut on the bottom to lean the tree around 10 degrees. Then about 52" up the trunk make a dark line around the circumference, with a large hatch mark 180 degrees from each other. Then make another cut through the line between 10 - 15 degrees. Don't go any steeper than that. (I'll explain later). Now that you have severed pieces, you will notice that they are oval not round. So place the short section on the top of the long, rotate and line up the two hatch marks you made before. Now the ovals should lay on each other fairly evenly. Now get in touch with your inner Red Green and reattach the sections with duct tape, and then again with layers of strip paper mache for strength.
Here's why you don't go too steep on the angle, the photo isn't the actual tube I ended up using... after cutting and lining up the hatch marks we decided that the lean ended up being too severe and the tree too short. As you can see, the jagged detailing at the top has already been added.
The stand was built using the finished angle of the tube. Base it on whatever degree you like. But we set the sono tube on 3/4" plywood and traced the inside oval twice for a top and bottom piece. Then had (4) 2x4x36" cut with an angle to match the lean of the tree. Attach one to top and one to bottom with sharpest part of ovals facing the lean. In the photo there are (4) 2x4x30" feet attached to the bottom oval to support the tree and to give a base for "evil roots".
Now you're ready to slide the tube over the stand, and wah-la, you have a free standing tree ready to work on! :)
Take your time in designing the face, the expression will determine the overall awesomeness. Go ahead and carve it with a rotary tool when you're ready.
Next, prime the interior, followed by two thorough coats of *flourescent* orange paint- we lovelovelove Wild Fire brand. You want to make sure the top of the stand is painted (see pic) and every little nook and cranny all around the tube up as far as you can go.
It's important to put a 'cap' inside the tube, so as not to lose light through the top. We used heavy cardboard, and paper mached over to secure it. I also mached around the features to smooth over any roughness- this is optional, but well worth it.
Nextly, you need to start giving your trunk an organic shape.
For the roots, cover your wood feet (and up the trunk a bit) with cello wrap. We used spray insulation foam to build up the detail. Taper the foam near the ground, and let it develop lots of lumps and bumps as you go. When it's dry- really dry, you'll be able to remove the foam from the trunk via the cello wrap. Now, against the trunk, continue the shape of the roots with foam or crumple paper mache, tapering it to blend. We added crumple mache branch stumps all over. Go crazy with detail- the gnarlier the better- just make sure you have a ton of good masking tape and duct tape.
When you're satisfied with the shape of your tree, it will be ready for the bark detailing. Go to the thrift store and clear them out of well worn (this is important- NOT snappy new) bed sheets. We like white, no distractions. I'm pretty sure this tree took a good four or five twin sized sheets, and it only cost a few bucks. :)
Mix yourself up some thick paste. Easy- mostly white glue, some warm water, some white flour... don't worry, it's hard to make a bad paste.
Working in manageable sections of sheet (about a third at a time is good), run it through the paste- squeegee off the excess with your fingers, but do not remove too much.
This is the funnn part!!! Lay your cloth mache on the trunk with lots of drape, creating vertical texture as you go. Move it around, give it natural directional patterns. Don't forget the roots as well- wrap that cloth around the back to conceal the foamy bits. FUN!!!! :D
Leave to dry for a day or two.
When the bark is super dry (hard), you'll need to bust out that primer again. Paint the entire trunk, making sure you get in all the grooves as you go. Now your tree needs to be painted in a true bark brown- a bit on the dark side is best, again, make sure you get in all those bark grooves to keep the illusion. (It's amazing how life like this looks in person!). When the dark brown has dried, you'll want to mix some of the leftover paint with a good dose of white. This gets ragged on, it will hit the high parts of the bark and add an excellent effect.
Now my friends, if you're still awake, it's time for arms!
Here we got kinda technical and dropped the duct tape. To frame the arms we used 5/16" threaded rod and cut them to 42". Using two small pipe wrenches, the rods were gradually bent to form branch frames, keeping them about 3" apart. Lay them on a table to keep them parallel and re-adjust where needed. If you have access to a welder it makes your projects easier. (sometimes) Weld the (3) 3" cross frame supports on to stiffen the arm frame. Otherwise, you can wire up the rods with mechanics wire. But don't bend the rod around to lock it in place as it does not have the give unless you really heat it first to make it pliable.
**Just make sure that the rod ends that will break through the bark are parallel. This is very important because you will build some bracket supports that the arm rods will go through and if you have rods that are not parallel and you try to force them through the holes of your bracket, your neighbours will be learning all your new curse words. But most likely you will damage your tree.
![]() |
| Dashed line represents armature wire detail |
With the arm frames finished, the next step is to transfer the desired position to the bark. With someone to help (unless you have three hands), hold the arm frame where you want it and circle the rod with a pencil. Then drill through with a clearance hole a bit larger than 5/16 such as 11/32 or 23/64.
Test the arm and make sure it passes through cleanly at least 3 inches.
If all is good than move on to the bracket supports.
Material 2x6x8-1/2 spruce. 3/4x2x6 plywood.
The arms may not weigh a ton, but it is smart to have some interior support to keep the rod's washers and nuts fom tearing through the wall.
This is an edge on end view of the wood needed, 2x6x8-1/2. It shaped by a hand planer to reasonably match the curve of the sonotube inner wall. I know what you're thinking, why bother? I'll just put a 2x6 in and it will work. Sure it will. But it will also only be in contact at two points, whereas this exquisitly shaped piece gives full support with more weight distribution. On the outside I placed a 3/4x2x6 to further support the arm. Over tightening will inevitably distort and crush your tube and bark. Plus it looks better. See comparitive image.
As you can see the block on the left that you took such time to craft sits flush in the tube and will give better support, far better than brand "X" on the right.
When the rods are placed through the holes of the support blocks, use a washer and a 5/16 nut to hold it in place. Tighten down but, do not over tighten as you will crush the bark.
When you have the frames mounted to the trunk of Spooky, grab a stack of newspaper and your masking tape, and go to town fleshing his arms out with crumple mache. Thicker near his trunk and tapering as you go keeps it believeable. Stop when you've mached up to the 'wrist' area. The fine finger branch detailing is done with armature wire. Double it up, and twist as much as you can. Snip the appropriate length, and attach to your arm by either wrapping around some exposed threaded rod, or jamming into your crumple mache. Again, tape the bejeezus at the connection to secure. Shape your wire to the desired position- nice and claw like. Repeat the cloth mache process along the entire length.
Since this is an illuminated prop, the next step makes this guy. Paint the areas you want to glow with white primer paint... it's necessary to have this base for the flourescent paint to be fully reactive. We wanted to acheive 'veins' up the trunk in a colour similar to what white fabric or paper looks like under blacklight. Usual white paint is uv inactive, so we mixed a violet shade with flourescent blue and flourescent magenta paint in a base of Wild Fire Luminous White. Paint this over the white details you added (I did several coats for optimal glow).
And finally, it's time to experiment with lighting! We placed a high lumen (140+) led flashlight in the mouth- it will sit perfectly on the stand (I like it facing the front of the tree). The outside requires a relatively strong blacklight... I super want a blacklight cannon, but until then, some compact flourescents worked just fine.
| finished tree, no lighting |
In retrospect one change I would have made would be to have the arm support blocks permanently mounted to the outside and inside of the body. Then lay the bark around it instead. Consider this as an option.
Wednesday, December 29, 2010
Christmas is nice...but Hallowe'en rules.
This is Darren from the Spookworks engineering dept. The boss left her computer opened so I hacked in. Well actually, she's reading her Christmas gifts "How To Haunt Your House." 1&2.
Now that Christmas is over, it is time to reflect on the difference I see out on peoples lawns. Personally, I love Christmas. I love the season, the food, the gifts and the f-f-f-family togetherness - two hours tops, and a game of Scrabble and get out!!!. Just kidding. Maybe.
However, I have seen how people decorate their homes for Christmas and I am curious why they cannot put the same effort into Hallowe'en. Is it because one holiday is a day long, and considered by some to be Pagan and immoral? Whereas the other, incidentally, also has hidden Pagan roots, is overwrought starting unofficially November 1 and has the uncanny musical ability to turn store employees and customers into mindless drooling zombies. Perhaps is Hallowe'en is not enough of a dreamy wonderland for some.
The fact is I love Hallowe'en, I don't know if it is the thought of what can we do on the front lawn or the actual building part. But I have never grown tired of the possibilities. Yet come November, there are a number of homes here in town that go nuts for X-Mas. Without hesitation they ditch a lame ghost or cheesy Michael's scarecrow for a herd of reindeer, cutesy snowmen up the wazoo or enough coloured lights on every tree, bush, twig, stray animal and tuft of grass to tan George Hamilton happily.
Sure Christmas is nice, but Hallowe'en is the time to unleash the warped creations from your darkest imaginations or fears. Just imagine being back in the dark times of Samhain celebrations, when people believed that the borders of shadow and light were gateways from which came the dead and creatures from the underworld so they could walk the Earth amongst the living for one night. Where hills would open up to unseen worlds of horror, or where those same gateways sometime led a hapless traveller to his doom.
This what we create in our yard haunts. This is the reason people come around to tour your yard. The vision that is built from a plan on paper to stand in your yard is the fear adrenaline that we all need.
I cannot say that I have had the same rush from seeing Frosty or Rudolf. Nor do I recall asking if the Santa on the grass is real or not. I do celebrate Christmas with my family and thoroughly enjoy watching my daughters turn on the lights that I hang from the eaves. No, I do not have a Santa on the roof, nor a snowman or ten foot candy canes leaning precariously. Call me a hypocrite. You may ask why can't I put the same effort into Christmas as I do for Hallowe'en? Simple, it has become too commercial and too long and drawn out. By the time Christmas does come around, we have been bombarded by the repetitive playing of canned Christmas music so much that we go numb to it. So sadly by Dec. 25, the lustre has faded.
In closing, I suppose I will have to bear the gingerbread flotsam that will hang wind blown and tattered until the unofficial close to the Christmas season...St. Patrick's Day.
Happy Haunting, Hallowe'en Rules.
Now that Christmas is over, it is time to reflect on the difference I see out on peoples lawns. Personally, I love Christmas. I love the season, the food, the gifts and the f-f-f-family togetherness - two hours tops, and a game of Scrabble and get out!!!. Just kidding. Maybe.
However, I have seen how people decorate their homes for Christmas and I am curious why they cannot put the same effort into Hallowe'en. Is it because one holiday is a day long, and considered by some to be Pagan and immoral? Whereas the other, incidentally, also has hidden Pagan roots, is overwrought starting unofficially November 1 and has the uncanny musical ability to turn store employees and customers into mindless drooling zombies. Perhaps is Hallowe'en is not enough of a dreamy wonderland for some.
The fact is I love Hallowe'en, I don't know if it is the thought of what can we do on the front lawn or the actual building part. But I have never grown tired of the possibilities. Yet come November, there are a number of homes here in town that go nuts for X-Mas. Without hesitation they ditch a lame ghost or cheesy Michael's scarecrow for a herd of reindeer, cutesy snowmen up the wazoo or enough coloured lights on every tree, bush, twig, stray animal and tuft of grass to tan George Hamilton happily.
Sure Christmas is nice, but Hallowe'en is the time to unleash the warped creations from your darkest imaginations or fears. Just imagine being back in the dark times of Samhain celebrations, when people believed that the borders of shadow and light were gateways from which came the dead and creatures from the underworld so they could walk the Earth amongst the living for one night. Where hills would open up to unseen worlds of horror, or where those same gateways sometime led a hapless traveller to his doom.
This what we create in our yard haunts. This is the reason people come around to tour your yard. The vision that is built from a plan on paper to stand in your yard is the fear adrenaline that we all need.
I cannot say that I have had the same rush from seeing Frosty or Rudolf. Nor do I recall asking if the Santa on the grass is real or not. I do celebrate Christmas with my family and thoroughly enjoy watching my daughters turn on the lights that I hang from the eaves. No, I do not have a Santa on the roof, nor a snowman or ten foot candy canes leaning precariously. Call me a hypocrite. You may ask why can't I put the same effort into Christmas as I do for Hallowe'en? Simple, it has become too commercial and too long and drawn out. By the time Christmas does come around, we have been bombarded by the repetitive playing of canned Christmas music so much that we go numb to it. So sadly by Dec. 25, the lustre has faded.
In closing, I suppose I will have to bear the gingerbread flotsam that will hang wind blown and tattered until the unofficial close to the Christmas season...St. Patrick's Day.
Happy Haunting, Hallowe'en Rules.
Monday, December 27, 2010
It's Show and Tell time!!
Well fiends, life kind of happened in a big ugly way and progress in the monster pit (studio) got derailed for a while... but we're back on the map, and happy to start blogging again! For those who have been patiently waiting (for an eternity), we're putting the last bits together for a full Spooky Tree tutorial- watch out for it in the next day or two!!
In the meantime, did anyone get (or give) any spooky stuff for Christmas? Santa always leaves some Halloween goodness at the Brooks house... check it out :)
Cutest vampire bat evah for our own little Wednesday Addams. Made by the extremely talented Binkys on Etsy.
Hello new and improved foam props!! :D
*drool* For the few who don't already have these, go and order them now...GO!
Shirt No. 1 - from zazzle.com
In the meantime, did anyone get (or give) any spooky stuff for Christmas? Santa always leaves some Halloween goodness at the Brooks house... check it out :)
Hello new and improved foam props!! :D
*drool* For the few who don't already have these, go and order them now...GO!
Shirt No. 1 - from zazzle.com
Shirt No. 2- from a wonderful ghoul... you know who you are!
Shirt No. 3- by the amazing Eric Pigors of Toxictoons
Shirt No. 4 (anyone notice a pattern here?).
Shirt No. 5. Nikki, have I told you lately that I love you? *Huge grin*
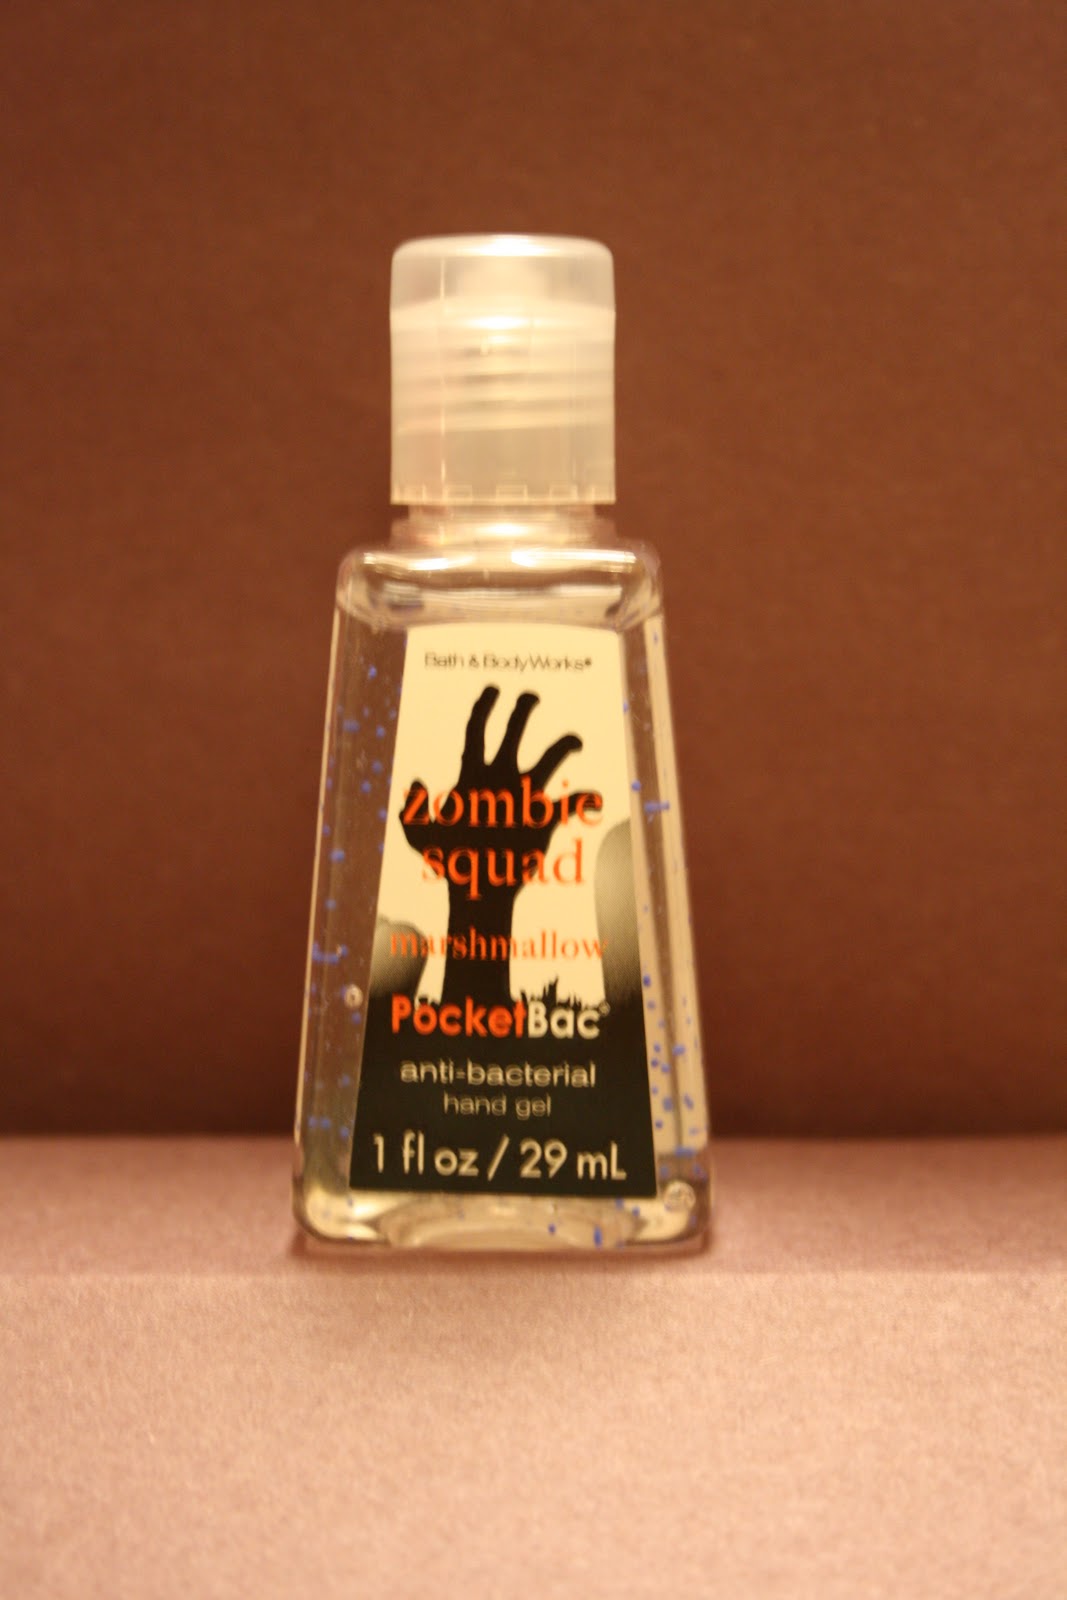
For the germaphobic zombie ;)
Very interesting premise... will do a review when I'm through!
Sunday, November 7, 2010
Mad love for my bff (best freaky fiend)!!!
Subscribe to:
Posts (Atom)